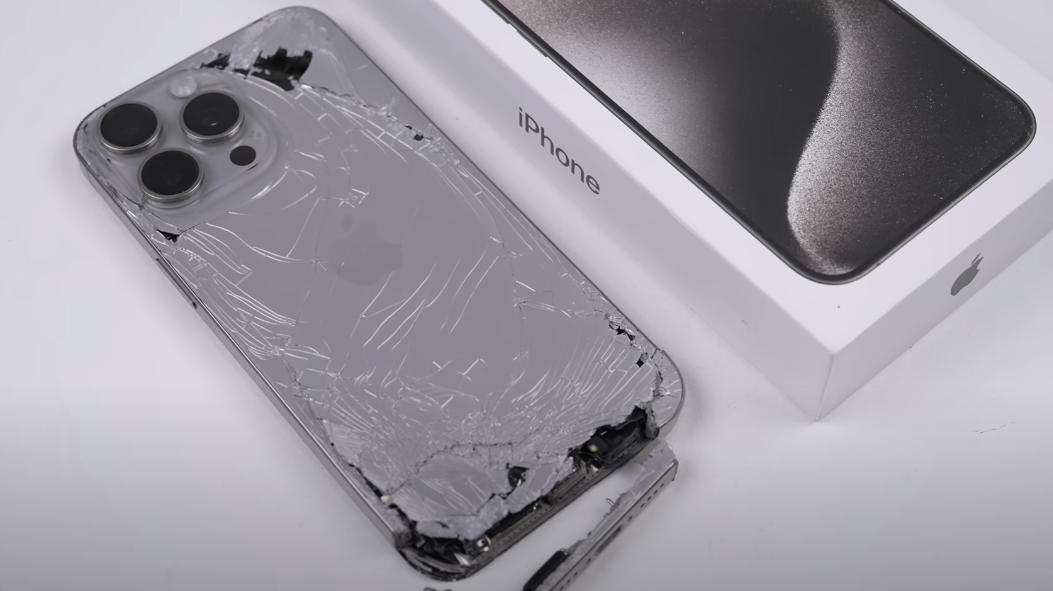
The iPhone 15 Pro Max is hailed as one of the most robust smartphones of its generation, sporting a sleek titanium frame and advanced tech. However, even the toughest devices are not invincible. This was proven recently when an iPhone 15 Pro Max fell from a rider’s pocket onto a motorway while traveling at a brisk 110 km/h (68 mph) on a motorcycle. The damage was severe enough to snap a section of the phone’s titanium frame clean off. The device had taken a brutal hit, and I was tasked with bringing it back to life.
Despite the enormous cost of the damage, which totaled $565 AUD (around $370 USD), repairing the phone still seemed more cost-effective than purchasing a brand new one, which retails for around $2,500 AUD ($1,600 USD). I was determined to breathe life back into this device, and as we’ll soon discover, even with such a drastic mishap, the repair journey proved to be a fascinating test of patience and precision.
The Impact: Unveiling the Weakest Link
The fall revealed a critical vulnerability in the iPhone 15 Pro Max: the antenna lines. These thin separators within the titanium frame, designed to enhance reception, proved to be the Achilles’ heel when the device was subjected to such high-speed force. Upon closer inspection, it was clear that the phone’s frame, while made of titanium, also incorporates other materials like stainless steel and plastic. This blend of metals and polymers is a common practice among smartphones, helping to balance durability and weight.
The impact also exposed a fracture in the frame, breaking off a significant section and leaving the phone essentially useless without repair. To make matters more complicated, finding a replacement frame was an expensive and time-consuming endeavor. The cheapest frame I found online was $37, but it never shipped. Apple’s own self-service repair store did not yet offer parts for the iPhone 15, leaving me no option but to attempt the repair myself.
The Repair Process: Rebuilding from the Ground Up
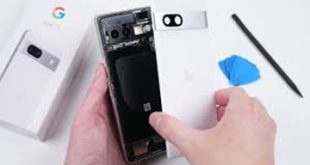
With the phone’s frame, glass, display, and charging port all severely damaged, it was time to dismantle the device. Heat was applied to soften the adhesive holding everything together, allowing me to carefully begin the teardown. While the bottom of the device was missing, the display still needed attention. Removing the display and battery involved some tricky work, especially since I had to first detach the numerous flex cables securing the internal components.
Before continuing, I tested the phone’s survival by temporarily connecting a new display. Miraculously, the device sprang to life! This gave me hope that it was salvageable, and I moved forward with the restoration.
Addressing the Damage: The Charging Port
One of the most difficult aspects of the repair was dealing with the broken charging port. The impact had not only destroyed the port itself but also the mounting brackets for the USB-C connector. These parts were impossible to find through Apple’s official repair store, so I had to source the necessary components from other sellers, often paying a premium for parts that were salvaged from other phones.
Removing the charging port involved navigating through an intricate web of screws, flex cables, and internal components. I also had to detach the logic board, which required removing the earpiece speaker and unhooking various cables. This part of the process was the most labor-intensive, as I had to carefully manage the removal of multiple parts, ensuring everything was undamaged for reassembly.
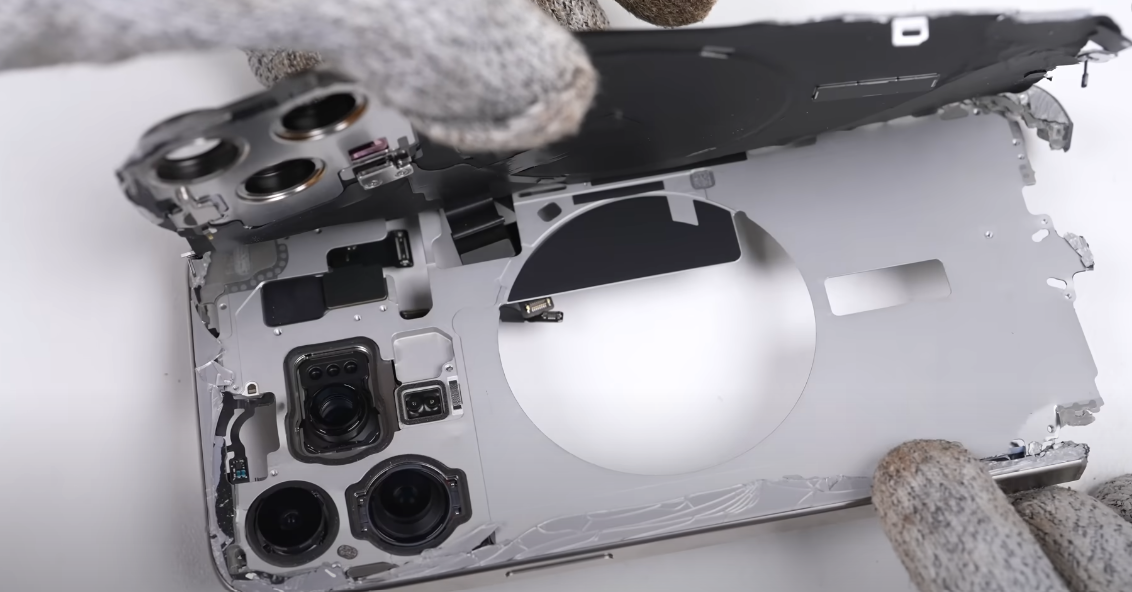
Repairing the Frame: A Delicate Art
Now that the phone was fully opened, the next challenge was repairing the damaged titanium frame. This required some ingenuity and craftsmanship. The broken pieces of the frame needed to be straightened out and reattached. I used a combination of clamps, pliers, and even a hammer to reshape the frame. Once the pieces were in place, I applied superglue to bond the sections back together. While it wasn’t a perfect restoration, the strength of the glue would hold the frame together securely for regular use.
The most impressive part of the frame repair was its functionality—thanks to its metal structure, the antenna functionality was unaffected, ensuring the phone would still perform just as well as before.
Reassembling the Phone: Bringing It Back to Life
Once the frame was repaired, the next task was reattaching the back glass and display. Unlike previous iPhones, the iPhone 15 Pro Max now features a removable back glass, which makes repairs much more manageable. After carefully cleaning up the adhesive and salvaging the necessary components from the broken glass, I was able to install the new rear panel.
For the front, I used pre-cut adhesive for the display, which went on smoothly compared to the liquid adhesive I used for the back panel. Once the display was securely fastened, I reinstalled the battery, logic board, and all the other internal components. The final touch was the charging port, which had to be installed and screwed into place, ensuring that the phone was fully functional.
The Final Product: A $1,250 Restoration
The cost of the restoration worked out to $1,300 AUD (around $850 USD), including all the parts and tools required for the repair. While this was still a significant investment, it was much cheaper than purchasing a brand-new iPhone 15 Pro Max, especially considering the cost of parts for newer models.
One of the major lessons learned from this repair is the high price of new model parts, which can often be 10 times more expensive than those for older models. It’s evident that while the latest phones have improved durability and features, they also come with a hefty price tag when it comes to repairs.
Despite some inevitable software restrictions, such as the loss of True Tone, color shift, and auto-brightness, the phone is fully functional. Face ID, wireless charging, and call functions all work perfectly, and the phone looks as good as new, even if it’s not factory-perfect.
Conclusion: A Victory Over Damage
Restoring this iPhone 15 Pro Max was no small feat, but it was a rewarding challenge. For anyone with a damaged phone, particularly those who face high repair costs, repairing a device yourself is a viable and often more affordable option. With the right tools and patience, even the most severely damaged phones can be brought back to life.
This experience also highlights the importance of repairability in modern smartphones. While manufacturers like Apple make it difficult to repair their devices through official channels, third-party repairs can often save consumers hundreds or even thousands of dollars. Whether you’re in it for the challenge or simply looking to save some cash, repairing a phone can be an incredibly satisfying and cost-effective solution.
If you enjoyed this video and want to see more phone restoration journeys, consider subscribing and checking out my playlist of repair assessments. If you’re looking for used devices or parts, be sure to visit my online store—link down in the description.
That’s all for this video, and I’ll catch you in the next one!