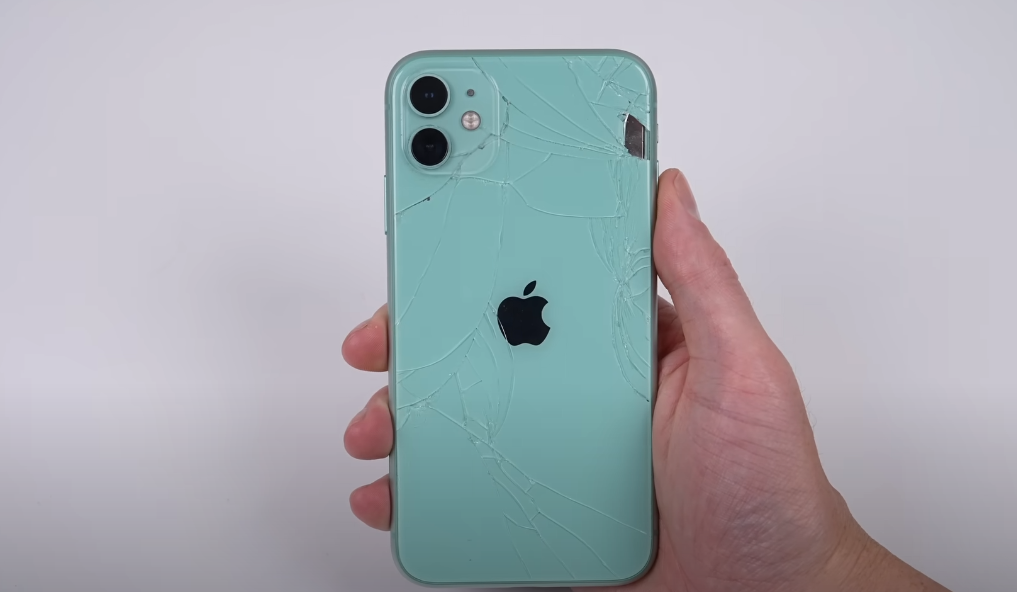
The iPhone 11 has made its way back to the repair table. It’s been a year and a half since I last worked on this phone, when it arrived in a sorry state: the screen was missing almost entirely, and the back panel was completely shattered. Despite its damaged appearance, I was able to restore it to a beautiful mint green version of the iPhone 11. Now, it has returned, and while the damage to the back panel is evident, the rest of the device is holding up remarkably well.
A Familiar Process, Yet With New Twists
Repairing the back panel on an iPhone 11 can be a delicate job. For models prior to the iPhone 14 and 15 Pro, replacing the back glass requires separating it from the housing, which can be trickier than it sounds. The process generally involves weakening the stubborn adhesive, which typically requires a specialized laser machine to cut through the powerful glue Apple uses. However, with this iPhone 11, the situation is different: the housing was previously replaced, and the adhesive used is much more manageable.
Although it is still strong, I can pry the glass off using only a simple pry tool. But, to make things a bit easier on myself, I still apply some heat, as heat tends to weaken adhesives, making them easier to remove. Once I started pulling off the glass, it was clear how little glue was used compared to Apple’s original design. This new adhesive application, while still strong, makes the repair process much less intimidating.
The Challenge of Wireless Charging
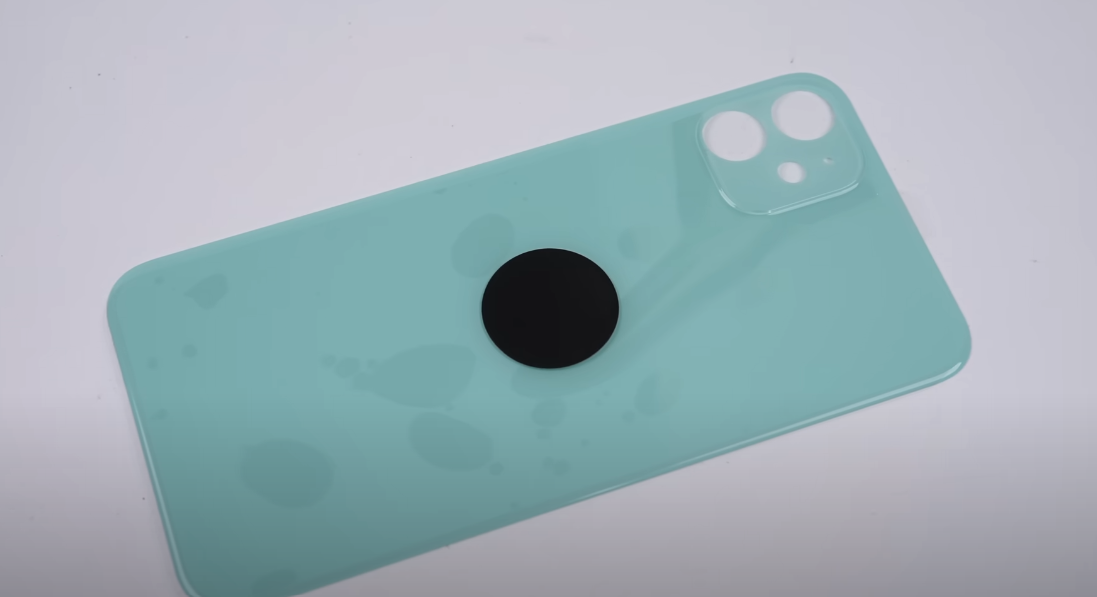
Underneath the glass lies the wireless charging coil, centrally located and glued to the back panel. In my previous repairs, I used liquid adhesive to secure the coil, which makes removing the old glass a challenge. I need to be careful to free the coil without damaging any of its tiny, delicate wires. The glue I used in this instance holds strong enough to get the job done without compromising the integrity of the charging mechanism.

Using a careful approach, I began to lift the surrounding glass, revealing the wireless charging coil beneath. Although the translucent silver film on top is attached to the glass, it doesn’t need to be saved — but I’ll try to preserve it if I can. As I progress, I’m amazed at how easily the glass is coming off, and how much cleaner the process is compared to previous repairs.
Breaking the Glass, But Not the Camera
When it comes to the camera lenses, things become a little trickier. The rear glass is installed beneath the lenses, and it’s fused with the steel frame. To free it, I essentially have to break the glass, but I must take care not to damage the camera lenses themselves or bend the camera frame. These are delicate components, and their cables are easily susceptible to damage.
I began breaking the glass carefully, ensuring that the camera and its components stayed intact. Once I had removed the majority of the glass, the iPhone was practically bare. The next step is to clean the frame thoroughly, removing any glass shards or residual adhesive so the new back panel will fit securely. Additionally, I needed to fill the void under the camera ring to prevent it from falling. While I could have used an O-ring for this purpose, I opted for glue, though I do wish I had discovered O-rings earlier. Either way, it worked fine, though it added a bit of extra time to the repair process as I had to wait for the glue to cure before moving forward.
Applying the New Back Panel
Now that the iPhone’s back was clear, it was time to attach the new glass panel. My replacement part came with a pre-cut adhesive strip, but I decided to use my regular liquid adhesive. This glue is strong enough for the task at hand, and its rubbery texture means that it’s forgiving if I need to remove the panel again in the future. The adhesive applied, I carefully placed the new panel onto the phone and clamped it down for a few hours while the glue cured.
After removing the clamps and cleaning up any excess glue, the phone looked as good as new. I was excited to test the phone, particularly to make sure that the wireless charging was working perfectly again. A quick replacement of the cracked screen protector rounded off the repair. The iPhone 11, once again, was ready for use.
The Final Touches
With the new back panel securely in place and everything functioning smoothly, I removed the protective film from the new glass. The iPhone 11 was officially restored, ready for its next chapter. It’s amazing how, with the help of aftermarket parts and a little patience, a device that once seemed beyond repair can be brought back to life.
This is now the second time I’ve repaired this particular iPhone 11. The journey of restoring it was made easier thanks to the improved adhesive used in the aftermarket parts. Though the process was still complex, it felt much more manageable than before. For those considering a similar repair, I recommend using an O-ring around the camera ring to ensure the new glass stays in place securely.
As this iPhone 11 is handed back to the family member I originally gave it to, I can’t help but feel a sense of pride in the work I’ve done. Repairing devices isn’t just about fixing something—it’s about breathing new life into them. And with that, the repair is complete.